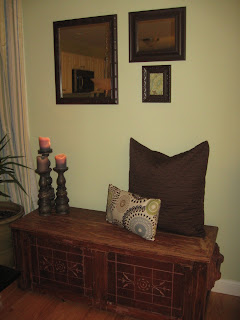
There are so many little touches that can add greatly to the impact of a room. The best rooms are ones that entirely reflect the energy of a person or family. Spaces should feel layered, as if collected and pieced together over time (even if that is not the case!). The smaller additions often tell the best stories and can become instant conversation pieces. Here are a few of my favorite "mini projects", as well as some accessories that were a steal (and pack a punch).
I love fabric! Besides the obvious uses (pillows, curtains, upholstery) it can be used as a piece of art. Whether it's framed or stretched across a canvas, used as a liner for a tray, wrapped around a lamp shade or adhered to the wall like wallpaper, fabric can be utilized to create layers in a room. Plus, it won't break the bank so feel free to get a little crazy if you find a print you truly adore. In small doses, even high end fabrics can be used on the cheap. In this project, I had three fabric samples that I was struggling with. They were too small to create pillows and they carried a lot of the same colors as the wall paint in our home. I decided on creating wall hangings with them by making three square frames and stretching the fabric across them.
The frames were made out of pine scraps leftover from another project. If you do not have access to a table saw to strip down pieces, simply go to your local home improvement store and have them cut down pieces. You will simply need to know what lengths you want the sides of your square. The frame can be secured using small nails or even wood glue. They will not be supporting a lot of weight so glue totally flies in this project! Using a stapler, I secured the fabric along the backside of the frame. When doing the corners, remember that you are only going to see the front, so fold the fabric so that it is pleasing to the eye. Then get crazy stapling!
Now to pop these frames off the wall......BLING IT UP!! Simple decorative upholstery tacks add a little sparkle and help to reflect some light from the border. These can be found at any hardware store. I picked these up at Lowe's for $1.29! They come in many finishes......as you will soon see! Plus, these can be used in a bunch of different places: around the edge of a table, the border of a lamp shade, around a picture frame, along the corners of a shelf. The list here is endless!
In another room, I used a similar idea with a completely different look. In our study, I mounted an old, used coffee bag I found at an antique shop in the same manner. I went with brass upholstery nails to vibe more with the colors in the burlap bag as well as the room itself.
Another simple project......
I found some inexpensive mirrors (large: $6.00, medium: $3.00) at a barn sale. Add to that a small, ornate frame and a can of semi-gloss spray paint.......
And I have an interesting grouping that bounces light into the dining area! Maybe you have a mirror or some old frames that are going unused in your basement or attic? A unifying color can instantly create a cohesive look!
Lastly, twine is one of my all time favorite materials to work with. In these two projects, all that is required is a glue gun and any object ( vase, frame, mirror) that you would like to add a little texture to!
Here I simply grabbed leftover vases that I was not using. To start, drop a little bit of glue along the base of the vase. Adhere the end of the twine piece and let cool before starting to wrap. Once the twine has adhered, start wrapping the vase with the twine and end wherever is pleasing to your eye.
Or use styrofoam balls to create some texture. These can be grouped with balls of other sizes in a decorative bowl or wide mouthed glass vase too!
I hope these mini projects have given you some ideas! Sometimes all you need is a little inspiration!
Tuesday, November 16, 2010
Subscribe to:
Post Comments (Atom)


Love the lil ideas!!
ReplyDelete